Monday, February 20, 2012

Ohell Obama

OBAMA'S COLLEGE CLASSMATE SPEAKS OUT

Description: cid:X.MA1.1328066117@aol.com

By Wayne Allyn Root, June 6th, 2010 
Barack Hussein Obama is no fool. He is not incompetent. 
To the contrary, he is brilliant. He knows exactly what he's doing.  He is purposely overwhelming the U.S. economy to create systemic failure, economic crisis and social chaos -- thereby destroying capitalism and
our country from within.  Barack Hussein Obama was my college classmate Columbia University, class of '83). 
Description: cid:X.MA2.1328066117@aol.com
  
He is a devout Muslim do not be fooled. 
Look at his Czars...anti-business. ..anti-American.  As Glenn Beck correctly predicted from day one, Barack Hussein Obama is following the plan of Cloward & Piven, two professors at Columbia University ..
They outlined a plan to socialize America by overwhelming the system with government spending and entitlement demands. Add up the clues below. Taken individually they're alarming. 
Taken as a whole, it is a brilliant, Machiavellian game plan to turn the United States into a socialist/Marxist state with a permanent majority that desperately needs government for survival ... and can be counted on to always vote for bigger government. Why not? They have no responsibility to pay for it. 
  
Universal health care. The health care bill had very little to do with health care. It had everything to do  
with unionizing millions of hospital and health care workers, as well as adding 15,000 to 20,000 new IRS agents  (who will join government employee unions). Obama doesn't care that giving free health care to 30 million Americans will add trillions to the national debt.What he does care about is that it cements the dependence of those 30 million voters to Democrats and big government.  Who but a socialist revolutionary would pass this reckless spending bill in the middle of a depression? 
  
Cap and trade. Like health care legislation having nothing to do with  health care, cap and trade has nothing to do with global warming. It has everything to do with redistribution of income, government control of the economy and a criminal payoff to Obama's biggest contributors.  Those powerful and wealthy unions and contributors (like GE, which owns NBC, MSNBC and CNBC) can then be counted on to support everything Obama wants.  They will kick-back hundreds of millions of dollars in contributions to Obama and the Democratic Party to keep them in power.  The bonus is that all the new taxes on Americans with bigger cars, bigger homes  and businesses helps Obama "spread the wealth around." 
  
Make Puerto Rico a state. Why? Who's asking for a 51st state?
Who's asking for millions of new welfare recipients and government entitlement addicts in the middle of a depression? Certainly not American taxpayers. But this has been Barack Hussein Obama's plan all along. His goal is to add two new Democrat senators, five Democrat congressman and a million loyal Democratic voters who are dependent on big government. 
  
Legalize 12 million illegal Mexican immigrants. 
Just giving these 12 million potential new citizens free health care alone could overwhelm the system  and bankrupt America.  But it
adds 12 million reliable new Democrat voters who can be counted on to support big government. Add another few trillion dollars in welfare, aid to dependent children, food stamps, free medical, education, tax credits for the poor, and eventually Social Security. 
  
Stimulus and bailouts. Where did all that money go? 
It went to Democrat contributors, organizations (ACORN), and unions -- including billions of dollars to save or create jobs of government employees across the country. It went to save GM and Chrysler so that their employees could keep paying union dues. It went to AIG so that Goldman Sachs could be bailed out (after giving Obama almost $1 million in contributions). 
A staggering $125 billion went to teachers (thereby protecting their union dues). 
All those public employees will vote loyally Democrat to protect their bloated salaries and pensions that are bankrupting America .. 
  
The country goes broke, future generations face a bleak future, but Obama, the Democrat Party,   
 government, and the unions grow more powerful. 
The ends justify the means. Raise taxes on small business owners, high-income earners, and job creators. Put the entire burden on only the top 20 percent of taxpayers, redistribute the income, punish success, and reward those who did nothing to deserve it (except vote for Obama).
 Reagan wanted to dramatically cut taxes in order to starve the government. Barack Obama wants to dramatically raise taxes to starve his political opposition. With the acts outlined above,  
Barack Hussein Obama and his regime have created a vast and rapidly expanding constituency of voters dependent on big government; a vast privileged class of public employees who work for big government; and a government dedicated to destroying capitalism and installing themselves as socialist rulers by overwhelming the system. 
Add it up and you've got the perfect Marxist scheme -- all devised by
my Columbia University college classmate Barack Hussein Obama using the Cloward and Piven Plan. 
  
  
"Correctly attributed" says snopes!

http://www.snopes.com/politics/soapbox/overwhelm.asp 
  
If he is re-elected in 2012, the US is finished.   
The following is in simple language that everyone can understand.   Not the gibberish that our government keeps telling people. Please   read this carefully and make sure you keep this message going.   
This needs to be emailed to everyone in the USA.

Saturday, February 11, 2012

Miracle' Marine loses final battle


Terribly burned in Iraq blast, sergeant defied odds; 'he was unstoppable'

16
Sgt. Merlin German, 22.
updated 5/24/2008 3:02:03 PM ET
The young Marine came back from the war, with his toughest fight ahead of him.
Merlin German waged that battle in the quiet of a Texas hospital, far from the dusty road in Iraq where a bomb exploded, leaving him with burns over 97 percent of his body.
No one expected him to survive.
But for more than three years, he would not surrender. He endured more than 100 surgeries and procedures. He learned to live with pain, to stare at a stranger's face in the mirror. He learned to smile again, to joke, to make others laugh.
He became known as the "Miracle Man."
But just when it seemed he would defy impossible odds, Sgt. Merlin German lost his last battle this spring — an unexpected final chapter in a story many imagined would have a happy ending.
"I think all of us had believed in some way, shape or form that he was invincible," says Lt. Col. Evan Renz, who was German's surgeon and his friend. "He had beaten so many other operations. ... It just reminded us, he, too, was human."
'I can do whatever I want' It was near Ramadi, Iraq, on Feb. 21, 2005, that the roadside bomb detonated near German's Humvee, hurling him out of the turret and engulfing him in flames.
When Renz and other doctors at the burn unit at Brooke Army Medical Center in San Antonio first got word from Baghdad, they told his family he really didn't have a chance. The goal: Get him back to America so his loved ones could say goodbye.
But when German arrived four days later, doctors, amazed by how well he was doing, switched gears. "We were going to do everything known to science," Renz says. "He was showing us he can survive."
Doctors removed his burn wounds and covered him with artificial and cadaver skin. They also harvested small pieces of German's healthy skin, shipping them off to a lab where they were grown and sent back.
  1. Only on msnbc.com
    1. Drones roam skies of US cities
    2. China to ban names that signal 'orphan' status
    3. Romney wins straw poll of GOP conservatives
    4. Sexy apps for Valentine's Day
    5. How to de-spam everything in your life
    6. Chaos continues in Syria as violence rages
    7. Bodies of 2 girls, grandmother found in Quebec home
Doctors took skin from the few places he wasn't burned: the soles of his feet, the top of his head and small spots on his abdomen and left shoulder.
Once those areas healed, doctors repeated the task. Again and again.
"Sometimes I do think I can't do it," German said last year in an Associated Press interview. "Then I think: Why not? I can do whatever I want."
His patient's good and bad days "Early on, he thought, 'This is ridiculous. Why am I doing this? Why am I working so hard?'" Renz recalls. "But every month or so, he'd say, 'I've licked it.' ... He was amazingly positive overall. ... He never complained. He'd just dig in and do it."
Slowly, his determination paid off. He made enormous progress.
From a ventilator to breathing on his own.
From communicating with his eyes or a nod to talking.
From being confined to a hospital isolation bed with his arms and legs suspended — so his skin grafts would take — to moving into his own house and sleeping in his own bed.
Sometimes his repeated surgeries laid him up for days and he'd lose ground in his rehabilitation. But he'd always rebound. Even when he was hurting, he'd return to therapy — as long as he had his morning Red Bull energy drink.
"I can't remember a time where he said, 'I can't do it. I'm not going to try,' " says Sgt. Shane Elder, a rehabilitation therapy assistant.
'He was unstoppable' That despite the constant reminders that he'd never be the same. The physical fitness buff who could run miles and do dozens of push-ups struggled, at first, just to sit up on the edge of his bed. The one-time saxophone player had lost his fingers. The Marine with the lady-killer smile now had a raw, ripple-scarred face.
Lt. Col. Grant Olbrich recalls a day in 2006 when he stopped by German's room and noticed he was crying softly. Olbrich, who heads a Marine patient affairs team at Brooke, says he sat with him awhile and asked: "What are you scared of?' He said, 'I'm afraid there will never be a woman who loves me.' "
Olbrich says that was the lowest he ever saw German, but even then "he didn't give up. ... He was unstoppable."
His mother, Lourdes, remembers her son another way: "He was never really scared of anything."
That toughness, says his brother, Ariel, showed up even when they were kids growing up in New York. Playing football, Merlin would announce: "Give me the ball. Nobody can knock me down."
'I've been given a second chance'
In nearly 17 months in the hospital, Merlin German's "family" grew.
From the start, his parents, Lourdes and Hemery, were with him. They relocated to Texas. His mother helped feed and dress her son; they prayed together three, four times a day.
"She said she would never leave his side," Ariel says. "She was his eyes, his ears, his feet, his everything."
But many at the hospital also came to embrace German.
Norma Guerra, a public affairs spokeswoman who has a son in Iraq, became known as German's "Texas mom."
She read him action-packed stories at his bedside and arranged to have a DVD player in his room so he could watch his favorite gangster movies.
She sewed him pillows embroidered with the Marine insignia. She helped him collect New York Yankees memorabilia and made sure he met every celebrity who stopped by — magician David Blaine became a friend, and President Bush visited.
"He was a huge part of me," says Guerra, who had German and his parents over for Thanksgiving. "I remember him standing there talking to my older sister like he knew her forever."
Fighting back German liked to gently tease everyone about fashion — his sense of style, and their lack of it.
Guerra says he once joked: "I've been given a second chance. I think I was left here to teach all you people how to dress."
Even at Brooke, he color-coordinated his caps and sneakers.
"If something did not match, if your blue jeans were the wrong shade of blue, he would definitely let you know. He loved his clothes," recalls Staff Sgt. Victor Dominguez, a burn patient who says German also inspired him with his positive outlook.
German also was something of an entrepreneur. Back in high school, he attended his senior prom, not with a date but a giant bag of disposable cameras to make some quick cash from those who didn't have the foresight to bring their own.
At Brooke, he designed a T-shirt that he sometimes sold, sometimes gave away. On the front it read: "Got 3 percent chance of survival, what ya gonna do?" The back read, "A) Fight Through, b) Stay Strong, c) Overcome Because I Am a Warrior, d) All Of The Above." D is circled.
Every time he cleared a hurdle, the staff at Brooke cheered him on.
Motivating others When he first began walking, Guerra says, word spread in the hospital corridors. "People would say, 'Did you know Merlin took his first step? Did you know he took 10 steps?' " she recalls.
German, in turn, was asked by hospital staff to motivate other burn patients when they were down or just not interested in therapy.
"I'd say, 'Hey, can you talk to this patient?' ... Merlin would come in ... and it was: Problem solved," says Elder, the therapist. "The thing about him was there wasn't anything in the burn world that he hadn't been through. Nobody could say to him, 'You don't understand.'"
German understood, too, that burn patients deal with issues outside the hospital because of the way they look.
"When he saw a group of children in public, he was more concerned about what they might think," says Renz, his surgeon. "He would work to make them comfortable with him."
And kids adored him, including Elder's two young sons. German had a habit of buying them toys with the loudest, most obnoxious sounds — and presenting them with a mischievous smile.
He especially loved his nieces and nephews; the feelings were mutual. One niece remembered him on a Web site as being "real cool and funny" and advising her to "forget about having little boyfriends and buying hot phones" and instead, concentrate on her education.
But he was closest to his mother. When the hospital's Holiday Ball approached in 2006, German told Norma Guerra he wanted to surprise his mother by taking her for a twirl on the dance floor.

Merlin German, Norma Guerra
Eric Gay  /  AP file
German with Norma Guerra.
Guerra thought he was kidding. She knew it could be agony for him just to take a short walk or raise a scarred arm. But she agreed to help, and they rehearsed for months, without his mother knowing. He chose a love song to be played for the dance: "Have I Told You Lately?" by Rod Stewart.
That night he donned his Marine dress blues and shiny black shoes — even though it hurt to wear them. When the time came, he took his mother in his arms and they glided across the dance floor.
Everyone stood and applauded. And everyone cried.
Clearly, it seemed, the courageous Marine was winning his long, hard battle.
"Some of the folks we lose — the fight to get better is too much," Elder says. "But Merlin always came back. He had been through so much, but it was automatic. ... Merlin will be fine tomorrow. He'll be back in the game. That's what we always thought."
A tragic turn
Merlin German died after routine surgery to add skin under his lower lip.
He was already planning his next operations — on his wrists and elbows. But Renz also says with all the stress German's body had been subjected to in recent years, "it was probably an unfair expectation that you can keep doing this over and over again and not have any problems."
The cause of his death has not yet been determined.
"I may no more understand why he left us when he did than why he survived when he did," Renz says. "I don't think I was meant to know."
As people learned of his death last month, they flocked to his hospital room to pay their last respects: Doctors, nurses, therapists and others, many arriving from home, kept coming as Friday night faded into Saturday morning.
German was just 22.
He had so many dreams that will go unrealized: Becoming an FBI agent (he liked the way they dressed). Going to college. Starting a business. Even writing comedy.
But he did accomplish one major goal: He set up a foundation for burned children called "Merlin's Miracles," to raise money so these kids could enjoy life, whether it was getting an air conditioner for their home or taking a trip to Disney World, a place he loved.
On a sunny April afternoon, German was buried among the giant oaks and Spanish moss of Florida National Cemetery in Bushnell. The chaplain remembered German as an indomitable Marine who never gave in to the enemy — or to his pain.
One by one, friends and family placed roses and carnations on his casket.
His parents put down the first flowers, then stepped aside for mourners. They were the last ones to leave his grave, his mother clutching a folded American flag.
Memorial Day is a time to remember the fallen with parades, tributes and stories.
A favorite story about German Sgt. Joe Gonzales, a Marine liaison at Brooke, has one to share about German.

Image: Merlin German, James F. Amos
Eric Gay  /  AP file
Merlin German with Lt. Gen. James F. Amos during German's promotion ceremony at Brooke Army Medical Center in San Antonio in May 2007.

Thursday, February 9, 2012

Another Brother Gone


Reserve Deputy Don Williams | Dale County Sheriff's Office, Alabama Dale County Sheriff's Office, Alabama

Reserve Deputy

Don Williams

Dale County Sheriff's Office, Alabama

End of Watch: Wednesday, February 8, 2012

Bio & Incident Details

Age: 55
Tour: 17 years
Badge # 26-77
Cause: Automobile accident
Incident Date: 2/8/2012
Weapon: Not available
Suspect: Not available

Share this memorial:
Reserve Deputy Don Williams died after being involved in a single vehicle accident on South Union Avenue, near Martin Street, in Ozark.

He had just completed serving civil papers when his patrol car left the roadway and struck several parked cars. It is believed that he may have suffered a medical emergency prior to the accident.

Deputy Williams had served as a reserve deputy with the Dale County Sheriff's Office for 17 years. He is survived by his wife and six children.
Please contact the following agency to send condolences or to obtain funeral arrangements:

Read more: http://www.odmp.org/officer/21186-reserve-deputy-don-williams#ixzz1lxKfoziY

Sunday, February 5, 2012

Bobby's Info

90+ Nissan 300ZX Timing Belt Replacement

[Thanks to Joe Fabbre for his contribution in this scarey task. Car shown is his 91 300ZX NA. Andy 9705]
[Thanks to Steve Chong for his comments and suggested changes (based on his own experiences with his 90 300ZX NA), which Joe agreed with and therefore have been blended in with Joe's procedures. Andy 9707]
[Thanks to Steve Chong for his additional notes (based on his recent experiences with his 90 300ZX TT.... yes.... he owns 2 90+ Z's). These notes are at the end of the procedures, right after the parts and price list. Andy 9710]
Intimidating...ehh? Not really, anyone with a little bit of experience working on cars can probably handle this job. Before I did this project, the only repair I had performed was replacing an alternator in a Subaru. This is definitely more complex and time consuming, but if you have some time to kill and want to save some money, DIY is the way to go.
When I did this to my car I had an oil leak in one of the cam shaft oil seal. This caused oil to leak all over the place and ruin my alternator. So, when I replaced the timing belt I also replaced the cam shaft oil seals and the alternator. I have broken this procedure into three parts. The first is getting down to the timing belt. Next is replacing the cam shaft oil seals, and last is putting it all back together. I have also listed the parts I needed at the end, and the cost of these parts.
One last note. I would highly recommend buying the service manual. Even though there is little detail in it, it is a very handy reference.


1.  Remove engine under cover. 

    (No picture)  Jack the front end of the car up and remove the big plastic
    cover that is directly under the radiator and everything else you'll need
    access to. When I did this three outta the six bolts broke due to rust.  
    Use some WD-40, drilling broken off bolts out is no fun.

2.  Drain coolant from both cylinder block drain plugs, and
    radiator drain cock.  

    I failed to drain the coolant from the cylinder block.  The bolts on
    the cylinder block are very hard to get to.  It may not be worth it if
    you don't mind cleaning up some coolant when you remove the water inlet 
    and outlet later on. Have a container ready, under the car, that will
    hold about 3 litres (half a gallon) that is around 30cm by 30 cm (1ft X 1ft)
    to catch the coolant.

3.  Remove radiator.

    There are two bolts at the top of the radiator and two
    hoses connected to it.  Undo these and lift it out. Note that the bottom of
    the radiator cowl can be unclipped to make it easy to pull the radiator out.
    If yor car is an auto, undo the transmission cooler pipes on the radiator,
    and plug them with a 3/8 inch bolt- threaded part cut
    off- to stop transmission fluid from leaking out.


4. Remove drive belts, cooling fan and coupling. The belts all have adjustment bolts that tighten and loosen the object that the belt is connected to. I am probably making this sound more confusing than it really is. The fan has four little bolts, the coupling has four nuts that connect it to the water pump. To make it easy to move the power steering and alternator belts, slacken off the alternator and power steering hinge bolts also. The power steering pump will be hard to move because of the heavy hoses connected to it. Wind the adjustment bolt for this almost right out, so that the end of the adjuster wont catch on the alternator braket when you try and move the power steering pump 5. Unplug the negative terminal from your battery. (Prevents a fun little jolt when playing with the starter.) 6. Remove the starter motor. It is right behind the oil filter. The manual says you have to remove the two heat shields first. I did this and it was a major PITA. When I put it back on I put the heat sheilds on first, then installed it. It was much easier this way. If I ever do it again I will not remove the stinkin heat sheilds. **Another list member (Darryl) pointed out that you can just take out the main bolt and nut holding the starter in, then pull it out enough to put a bent screwdriver or other tool in place. This sounds much easier than taking the whole thing out. If you have a manual transmission, to save you undoing the starter motor, you could put the transmission into 5th gear, chock the rear wheels, and put the handbrake on firmly. This should hold the crankshaft enough to allow you to undo the crankshaft bolt. 7. Remove the crankshaft pulley bolt. You need a 27MM socket for this bad boy. Insert a big flathead screwdriver at the bottom part of the gear that was revealed when you removed the starter motor. This will keep the crank- shaft from turning when you are trying to remove the cranshaft pulley bolt. NOTE: The crankshaft pulley bolt on this car is NOT reverse threaded. Remove it like all of the other bolts. Also, you will probably need someone to hold the screwdriver in place, while you jump around on the bolt with the socket wrench. 8. Remove the crankshaft pulley. You are going to need a puller for this job. I bought a nice one at Sears for $30, not realizing I could borrow a nice one from either Pep Boys or Super Track for free. >:\ I put the crankshaft pulley bolt in part way in order to give the puller something to pull against. It even has a rounded out area on the head of the bolt that looks like it was made for this. The crankshaft pulley has two 6mm threaded holes in it to allow you to insert the puller bolts. If you have a piece of 1/4 inch iron bar and a 3/8 nut and bolt and a couple of long 6mm bolts, you could make your own puller up quite quickly 9. Remove the water inlet and outlet. These are the two aluminum pipes that had the radiator hoses connected to them. I had to buy the longest allen wrench Sears had in order to get a the bolts holding these guys in. The allen wrench size required is 6mm. You can also buy an allen wrench that has a 3/8 inch drive, and using a 6 inch extension on this with your ratchet makes getting these things out easy Prepare for a flood if you did not drain the cylinder block of coolant. 10. Remove the crank angle sensor. Three little bolts. No problem. Here's a pic of my friend holding the crank angle sensor.

11. Remove the front timing belt covers. Bolts galore. Most need allen wrenches. This picture shows the timing belt. The auto tensioner is just to the left of the water pump (which is the clean part in the middle of the timing belt loop).

12. Install a 6mm bolt by 16mm long into the auto tensioner so it doesn't slam forward when you take it out. You should see a hole for this on the right side of the tensioner. 13. Set the No. 1 cylinder at top dead center (TDC) on its compression stroke. You will know you are at TDC when all five of the aligning marks (4 on the cam sprockets and one on the crankshaft) match up with the marks on the back timing belt cover and oil pump housing. 14. Remove the autotensioner and the timing belt. This picture shows the timing belt off, and the auto tensioner removed.


The following is the camshaft oil seal replacement procedure.


Yes, you need to remove those four gears. Two of them have cover plates on them. Be careful taking those off. They are spring loaded to hold in a big bolt behind the plates. After you get the plates, and springs off you have to remove that big bolt. There are some holes in the sprockets. You can stick a screw driver in these holes and wedge it between one of the bolts holding the back timing belt cover on. You can also use a 10mm "deep socket" on an extension, and hold it onto one of the two back cover plate bolts that you can see through the cam sprocket. If you use this method, you wont scratch the back cover plate, Should look something like this:


Be careful not to let the sprockets slam around too much. They will want to rotate with a lot of force once you turn them a certain amount. The first time this happened to me, it scared the sh*t out of me. I was much more careful after that. It really helps to have a partner help you out with this part. If you use the deep socket method, you wont need a partner. Those two with the round plates are the intake cams. (After reading this over I didn't think it was clear enough... You need to stick the screwdriver in the sprocket to keep it from rotating while you unscrew that bolt.) The exhaust cams are a little easier. There are four smaller bolts that hold these on. these are an uncommon size: 7mm. Use the screwdriver as a wedge again with these. They are a lot easier because they are much more open. After these are off, take the back timing belt covers off. You should be able to see the seals now. Here is a pic of the right side cams sans sprockets:


The manual says you can get them out by prying on the inside of the ring. I was unable to get them out this way and I was really worried about scratching the camshaft. Be *very* careful not to scratch the camshaft or you will have a very expensive oil leak to fix instead of a cheap one. Anyhow, I took a medium size flathead and placed it at an angle on the outside of the ring. Then I took a hammer and tapped it forcefully but carefully until I slightly bent the oil seal. Then I was able to get in around the outside of the seal and pry it off. Here is a pic with the screwdriver in place:


For re-installing the seals, I went to home depot and bought a pvc joint (short peice of that white plastic pipe) that exactly fit the oil seal.


Tap around the pvc to put the oil seal in place. Make sure you oil up the seals before you put them in. The one's that go on the exhaust camshaft are kindof a tight fit. Be patient, they'll go. Make absolutely certain they all go on straight.


Here is the rest of the timing belt replacement procedure.


1.  Make sure all of the aligning marks are lined up.
 
2.  Manual says to remove all of the spark plugs at this point.
    I think it is to releive the compression when the
    gears get rotated later.  Not really sure if you need to
    do this or not.
 
3.  Set the timing belt in place.  Make sure the arrows face forward.
 
4.  Use a vise or clamp to adust the auto tensioner to 4mm of space
    in the gap. ***Do NOT try to do this adjustment by cranking down
    the screw.***  After you have squeezed the thing down to 4mm, 
    screw down the holding screw.  
 
5.  Put the auto tensioner in.  You will probably need a big screw
    driver to pry it over into postion to put in the bolts.  Finger
    tighten the bolts.
    
6.  The manual takes a whole bunch of steps now rotating the     
    cams back and forth.  I did this, but didn't really see the point.
    You basically want to pry the tensioner over some more (not too
    much) and tighten down the two bolts and nut that hold it in 
    place.  I definitely did this section by feel.
 
7.  Measure the deflection of the belt on both sides of both exhaust
    cams.  Make sure the average of these deflections is between
    6 and 7mm.
 
8.  Make sure the auto tensioner is tight and in place, then remove
    the stopping bolt.  The auto tensioner should not move much at
    this point.  Wait for five minutes then make sure the projection
    of the rod in the tensioner is between 3.5 and 5.2 mm.  Mine did
    not move at all when I took out the stopper bolt.  Lucky I guess.
 
9.  Give it a once over to make sure nothing has slipped and the belt
    looks like it is lined up well on all of the sprockets, then put
    the timing belt covers back on and everthing else that came off
    beforehand.
 

Here is a list of the parts I had to buy, along with the list price and price that I paid. I got everything from my local dealer except the cam shaft oil seals. I think you can get even better prices from NISSAN Auto Parts dot com .


Part                                     List        Paid
------------------------------------------------------------
Timing belt cover gasket-fr               8.50        6.80
Timing belt cover gasket-cov             13.19       10.55
Water Pump                               87.67       70.14
Fan Belt                                 14.05       11.24
Power Steering Belt                      17.38       13.90
Compressor Belt                          17.38       13.90
Timing Belt                              46.95       37.56
Alternator                              265.04      212.03
Windsheild wiper fluid valves             5.91        4.72
Thermostat                               13.50       10.80
Auto Tensioner                          153.82      123.20

Cam shaft oil seals (4) *Not from dealer* 5.99 each= 23.96
------------------------------------------------------------
                                                    538.80


Supplementary notes for the 90TT and further tips for 90NA by Steve Chong


Notes for the 90TT

Surprisingly, changing the cambelt and seals on the 90TT is less difficult than on the 90NA, as there are less pipes to undo. Follow the procedures in section 1 & 2 in Joe's article, then to remove the radiator you need to disconnect the two rubber air intake hoses that couple up to the throttle valves. This gives enough clearance for you to remove the radiator. The radiator arrangement is different in the TT compared with the NA, and provided you disconnect the bottom radiator hose, you can withdraw the radiator without undoing the top plastic cowl. The bottom radiator cowl is clipped in three places (same as the NA). If your TT is an auto you'll need to disconnect the transmission cooling pipes, but unlike the NA auto, its best to disconnect them where they join at the alternator support bracket, because these pipes run up to the left hand side of the radiator, not to the bottom of it in the case of the NA. You can withdraw the radiator with the rubber transmission hoses connected to it. I also took the opportunity to replace these rubber pipes, as they were leaking at the alternator bracket connection point.
As with the NA, its not necessary to remove the starter motor shields to remove the starter motor itself. With a bit of juggling, you can get it past the catalytic convertor air feed pipes. Both starter motor main bolts are 14 mm, and the nut securing the main cable to the starter motor can be undone with a 12mm ring spanner.


Notes for the 90TT & 90NA


The Front Seal

If you're going to change the cam seals, then I believe its a good idea to change your front seal at the same time as it normally only takes a few minutes extra. Note that for every revolution of the camshaft, the crankshaft has to rotate twice, so you would expect the front seal to be worn twice as much as the camshaft seal. Indeed, this was what I found in my case.
If you have the manual, you'll note on page EM 22 that it says you need to remove the oil pan and oil pump assembly to change the front seal. This is not the case, and you can remove it in the same manner as per Joe's recommendation, which I found easier than what was recommended in the manual. However, for putting the new front seal back on, make sure your PVC joint, as shown in Joe's pics is at least 60 mm (2 1/2 inches) long, as it has to go a fair way over the crankshaft spindle. To get at the front seal, simply lever the cambelt drive sprocket off the crankshaft. In 99.999% of cases, this comes off with no problems.
The front seal and all 4 cam seals are physically identical, even though the front seal may have a different part no.


Problems with the cambelt drive sprocket

In 0.001% of cases (and in my case), the cambelt drive sprocket doesn't come off easily. Mine was rusted solid onto the crankshaft, and if this happens to you, make sure you're having a good day first. To get it off I first tried WD 40 for a couple of hours. This didn't work, so I added heat to about 100 deg. C (212 deg. Fahrenheit). You can't take the temperature too high without risking damage to the oil pump seals and O rings, and oil pump housing gaskets which are directly behind the sprocket. This didn't work either so I decided to drill 4 holes into the sprocket and tap them with a 6 mm thread. To avoid removing the air conditioning radiator, and escalating the complexity of the job, I hired a 10 mm (3/8 in) right angle drill to drill into this sprocket.
Then I made a puller, using 6 mm high tensile steel bolts to screw into the the sprocket, and a 10 mm (3/8 in) standard nut & bolt for the main pull. I wound the 10 mm bolt up so hard the thread stripped, but the sprocket still wouldn't come off. The next step was to use a high tensile 10 mm nut & bolt, simultaneously heating the sprocket, and belting the puller with a hammer. This worked, and an hour later the sprocket was off. This whole procedure sounds simple, but took me a couple of days to sort out, and I was relived that I didn't have to grind the sprocket off, which I was prepared to do as a last resort.


Intake Cam sprockets

These cam sprockets look the way they do because they are part of the variable valve timing system. At engine speeds below 3000RPM , oil from the main oil gallery is fed into the sprocket itself, via the camshaft, to operate a spring loaded gear. The spring loaded gear advances the sprocket 10 degrees relative to the camshaft, increasing low end torque.
If you're taking these things off, take a moment to inspect the back plate. You'll notice there is a seam between the back plate and the body of the sprocket, and this appears to be secured by some sort of press fit. If the seam is loose, you'll be able to rotate the back plate by hand, and if you can do this, it won't be long and oil will be pouring out the seam (which happened to me).
I repaired my sprockets by soldering up the seam.


Spark plug removal

The manual says to remove the spark plugs, to make it easier to rotate the engine for aligning the timing marks and for subsequent belt tension adjustment. This first time I did this job, I did remove the spark plugs, but for the next times I didn't bother, and had no problems.


Cambelt alignment

The timing mark on the cambelt drive sprocket (on the crankshaft) is really tiny, and hard to see. I put a dab of white paint on mine to show it up more clearly. Also, I put a bit of white paint on the cambelt teeth which go either side of the drive sprocket timing mark, because you can't actually see the alignment mark on the belt when you've got it on the sprocket. I think this is why the manual recommends you count the number of teeth between sprockets. If you use the paint method, you don't have to count the teeth. Try counting 59 teeth in an uncomfortable position in a confined space, without a mistake, and I'm sure you'll wonder if there's a better way.


Antifreeze

After completing the cambelt/ seal work, and if you did what Joe did, you'll need 2 liters (1/2 gallon) of antifreeze to retain a 30% concentration of glycol when you top the radiator back up.


Time taken

This job normally takes 6-7 hours not including complications for a qualified Nissan specialist in a workshop environment. By contrast, it took me 16 hours (over 2 days, not including complications) as I'm not a mechanic or mechanical engineer and don't have a lot of specialized equipment.
End of document.


Back to the Home Page

Saturday, February 4, 2012

Another Family Lost

ODMP Remembers...

Police Officer Steven Green | Mobile Police Department, Alabama Mobile Police Department, Alabama

Police Officer

Steven Green

Mobile Police Department, Alabama

End of Watch: Friday, February 3, 2012

Bio & Incident Details

Age: 36
Tour: 1 year, 8 months
Badge # Not available
Cause: Stabbed
Incident Date: 2/3/2012
Weapon: Edged weapon
Suspect: Deceased

Share this memorial:
Police Officer Steven Green was stabbed to death by a prisoner outside of the Mobile County Metro Jail at approximately 3:50 pm.

The subject had been arrested by an off duty police officer earlier in the day when he attempted to rob a dollar store. He had approached the store's checkout counter, demanded money, then lit the counter on fire after spraying it with lighter fluid. An off duty officer shopping in the store tackled him and took him into custody.

He was processed at the police station and was being transported to the county jail by Officer Green when he attacked and fatally stabbed Officer Green outside of the jail complex. The subject then stole the officer's service weapon and patrol car. Other officers pursued the suspect to a home off of Dauphin Island Parkway where he engaged them in a shootout, wounding one officer in the arm. The suspect suffered a fatal gunshot wound during the exchange of shots.

Officer Green had served with the Mobile Police Department for 20 months. He is survived by his wife and children.
Please contact the following agency to send condolences or to obtain funeral arrangements:
Chief of Police Michael T. Williams
Mobile Police Department
2460 Government Street
Mobile, AL 36606

Phone: (251) 208-1700

Read more: http://www.odmp.org/officer/21149-police-officer-steven-green#ixzz1lRHodhIi

Wednesday, February 1, 2012

Hell No Parole

Cop Killer Parole Alert
An inmate connected to this officer's death is up for parole.
Click to send a letter to the parole board in less than 30 seconds.
ODMP Remembers...

New York City Transit Police Department, New York
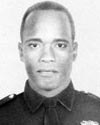
Police Officer Sidney L. Thompson | New York City Transit Police Department, New York

Police Officer

Sidney L. Thompson

New York City Transit Police Department, New York

End of Watch: Tuesday, June 5, 1973

Bio & Incident Details

Age: 36
Tour: 6 years
Badge # 3801
Cause: Gunfire
Incident Date: 6/5/1973
Weapon: Gun; Unknown type
Suspect: Sentenced to life
Share this memorial:
Officer Thompson was shot and killed while attempting to arrest a fare evader at IRT Station 2 in the Bronx. While attempting to arrest a suspect, the suspect's companion shot him. Despite being wounded, Officer Thompson was able to return fire and wound the suspect he had originally stopped. He was assigned to Transit District 12. Both suspects were members of the Black Liberation Army and were apprehended several days later.

The gunman was convicted of first degree murder and sentenced to life. He has been denied parole seven times. He has another parole hearing in February of 2012.

Officer Thompson had been a member of the New York City Transit Police Department for six years and was survived by his wife, son, and daughter
The Black Liberation Army was a violent, radical group that attempted to fight for independence from the United States government in the late 1960's and early 1970's. The BLA was responsible for the murders of more than 10 police officers around the country. They were also responsible for violent attacks around the country that left many police officers wounded.
Leave a Reflection · Update Memorial

Read more: http://www.odmp.org/officer/13265-police-officer-sidney-l-thompson#ixzz1lAFdHGgG